Thursday, December 16, 2010
Peppermint Marshmallow Pops
1 ~ 10 oz package marshmallows
1 ~ 14 oz package white chocolate melts, recommended: Wilton
1/2 t peppermint extract
30 peppermint discs, crushed*
30 lollipop sticks
Cover cookie sheet with wax paper. Melt white chocolate discs according to package instructions. Press one lollipop stick in center of each marshmallow and place on wax paper. Dip each marshmallow into chocolate until completely covered while holding stick. Gently tap stick on side of bowl to remove excess chocolate. Sprinkle crushed peppermint candy evenly over chocolate, including top of marshmallow. Return pops upside down (stick pointing up) to wax paper.
Let stand at room temperature until chocolate is set, or place in refrigerator for 15 minutes. Store tightly covered at room temperature. Yield 30 marshmallow pops.
Chef's Note:
* I used a mortar and pestle to crush my peppermints. Much easier than using a rolling pin to bang on my countertop.
There is enough white chocolate to dip the remaining marshmallows half in chocolate, just crush more peppermints. I found that it took approximately one peppermint disc to cover each marshmallow.
Special thanks to my dear friend D.L. White for the use of her Wilton Melting Pot (pictured below). It melts the candy in minutes and has a warming setting that keeps the candy at the perfect temperature for dipping. A must have for all candy makers. (Santa, are you reading this?)
Labels:
Candy,
Holiday,
Peppermint,
White Chocolate
Peppermint Bark ~ adapted from Food Network
2 ~ 12 oz packages white chocolate morsels, recommended: Nestle's
6 oz. peppermint sticks, recommended: Bob's
1 t peppermint extract
Cover cookie sheet with wax paper and set aside. Seal peppermint sticks in zip top bag. Crush sticks using rolling pin until no bigger than 1/4 pieces remain.
In medium microwave safe bowl, place white chocolate and heat in microwave 1 minute on high power. Remove and stir. Continue microwaving at 10 second intervals, stirring well after each, until chocolate is almost completely melted. Stir well until no lumps remain and add peppermint extract.
Pour onto cookie sheet and spread into even layer approximately 1/4 inch thick. Sprinkle with crushed peppermint candy and press candy slightly into chocolate.
Place cookie sheet in freezer for 30 minutes to harden. Remove from freezer and break candy into chunks. Store tightly covered at room temperature. Yield approximately 2 pounds candy.
Labels:
Candy,
Holiday,
Peppermint,
White Chocolate
Thursday, December 9, 2010
Orange Hazelnut Hot Cocoa
2 c milk
peel from one orange
6 rounded tablespoons Hazelnut Hot Cocoa, recommended: Ghiradelli
1/8 t fresh ground nutmeg
Place milk in microwave safe 2-cup measuring cup. Using vegetable peeler, remove peel from orange, taking care not to remove too much white pith with the peel, and place in milk. Microwave milk and orange 2 to 3 minutes or until desired warmth. Carefully remove orange peel and discard. Add cocoa and nutmeg and stir well to combine. Pour into two mugs and serve immediately. Serves 2.
Wednesday, December 8, 2010
Cheddar Cheese Sauce
3 T butter
3 T flour
1/2 t salt
1/8 t fresh ground black or white pepper
1 1/2 c milk
1 c grated sharp Cheddar cheese
In medium saucepan, melt butter over low heat. Remove from heat and whisk in flour, salt and pepper. Whisk in 1/4 c milk and whisk until smooth. Gradually add remaining milk, whisking until well mixed. Return to cook over medium heat, stirring constantly, until thick enough to coat the back of a spoon (approximately 5 minutes). Remove from heat, add cheese and stir until completely melted. Serve over pasta, vegetables or sandwiches.
Yield 2 cups.
Friday, December 3, 2010
Pumpkin Bread ~ adapted from Food Network
3 c sugar
1 c vegetable oil
4 eggs, lightly beaten
1-15 oz can solid pack pumpkin (NOT pie filling)
3 1/2 c flour
2 t salt
2 t baking soda
1 t baking powder
1 t nutmeg
1 t allspice
1 t cinnamon
1/2 t cloves
2/3 c water
Preheat oven to 350°. Butter and flour 2 ~ 9 x 5 loaf pans and set aside.
In bowl of mixer fitted with paddle attachment, mix together sugar and oil. Add eggs and pumpkin and mix just until combined. Whisk together dry ingredients in separate bowl. Alternately add dry ingredients and water into wet mixture, starting and ending with dry. Mix just until combined.
Divide batter between prepared loaf pans and bake 50-60 minutes or until cake tester comes out clean. Let stand 10 minutes, remove from pans and cool.
Labels:
Bread,
Pumpkin,
Quick Bread
Thursday, November 11, 2010
Instant Marinara Sauce
14 oz can no sugar added tomato sauce
3 T tomato paste
2 T olive oil
1/4 c grated parmesan cheese
1 t garlic powder
1/2 t dried oregano
1/2 t dried basil
pinch kosher salt
fresh ground black pepper, to taste
Place all ingredients in small saucepan and heat over medium heat to just below boiling. Serve with your favorite pasta. Serves 4.
Chef's Note: Don't skip using tomato paste. It's concentrated flavor gives this recipe a long-cooked taste in a fraction of the time.
Thursday, November 4, 2010
Toasted English Muffin
Today I am wishing for fall but alas, Phoenix doesn't do fall. In September we go strait from "why would anyone choose to live in this heat?" to "why doesn't everyone want to live here?" and we park there until June.
Don't get me wrong, I love living where we can go outside anytime without putting on an additional outfit for warmth. However, being a red-head with fair skin I tend to be drawn to autumn colors. The texture of bare branches and turning leaves cast against a clear blue sky is my idea of what "fall" should look like and since I can't have that experience by looking out my window, I have to fake it with indoor decorations.
And with food.
This morning I am craving a fall-like food for breakfast but it's still too hot to turn on my oven except to broil toast. I scrounged my fridge until I found what would get me by until it cools outside and I can bake something with pumpkin. (I LOVE pumpkin in breads and cakes and cookies... Pumpkin pie? Not so much.)
What makes this particular breakfast "fall-like" are the specific ingredients that taste like fall to me. I used mini Wild Maine Blueberry English Muffins topped with extra tart Orange and Lemon Marmalade and a cup of tea.
Extremely satisfied with my breakfast, am I.
The Perfect Toasted English Muffin
1 fork-split English Muffin
1 t butter, softened at room temperature
1 t orange marmalade
Preheat broiler to high and adjust oven rack to highest position.
Using a fork, pierce sides of muffin all the way round until it splits into equal halves. Butter inside of each half and place on baking sheet, butter side up. Position baking sheet directly under broiler and toast muffins until edges are golden and butter is bubbly. Remove to plate and top with marmalade while still hot. Serve immediately. Serves one.
Chef's Note: Please use a FORK to open "fork split" muffins to allow the air-pockets inside the muffin to be torn open yielding greater surface area for butter distribution. This is why I buy English muffins to begin with, for the crunchy way they toast up.
If you slice them open with a knife, the muffin will come apart looking like regular bread instead of having the nooks and crannies that toast so beautifully when coated with real butter and placed in the broiler. If you use a knife, you might as well put the muffins in the toaster. Or, just buy wonderbread. Please, for the love of breakfast, don't do this.
Labels:
Breakfast,
Kitchen Tips,
Muffins,
Toast
Wednesday, October 20, 2010
Easy Cornbread
1 & 1/4 c flour
3/4 c yellow corn meal
1/4 c sugar
2 t baking powder
1/2 t salt
1 c milk
1/4 c oil
1 egg, beaten
Preheat oven to 400°. Grease 8x8 pan and set aside. Mix dry ingredients in small bowl. Add milk, oil and egg and stir just until incorporated (lumps will remain). Pour into prepared pan and bake immediately in preheated oven 25 minutes or until golden and center is set. Makes 9 3-inch squares.
Chicken and Black Bean Chili
1 lb boneless, skinless chicken breast ~ cubed
2 T olive oil
1/2 one white onion, quartered
pinch salt
1 ~15 oz can black beans, rinsed and drained
1 ~15 oz can white or pinto beans, rinsed and drained
1 ~10 oz can mild Rotel tomatoes & green chile
2 T mild chili seasoning, recommended: McCormick
1/2 t cumin
1/4 c shredded monterey jack cheese
sour cream, optional
chopped fresh cilantro for garnish, optional
1 lime, sliced in wedges
Heat olive oil over medium high heat in dutch oven. Add chicken and cook until no longer pink and juices are clear (approximately 6 minutes). Remove chicken and keep warm. Add onion and salt to pot and saute until onion is wilted and translucent.
Stir in Rotel and beans, return chicken to pot. Stir in chili seasoning and cumin and bring to boil. Reduce heat to low, cover loosely and continue cooking 30 minutes to 1 hour, stirring occasionally. Garnish with cheese, sour cream, lime juice and cilantro if desired. Serve with hot cornbread. Serves 4.
Monday, October 18, 2010
Mesquite Honey Lime Chicken
4 boneless, skinless chicken breasts
1 T olive oil
salt and fresh ground black pepper, to taste
1/4 c A.1. Smoky Mesquite steak sauce
1/4 c lime juice
1 T honey
1/2 t garlic powder
Place steak sauce, lime juice, honey, and garlic in non-reactive bowl. Whisk well until combined and set aside.
Heat oil 3-5 minutes in large non stick skillet over medium-high heat. Season both sides of chicken with salt and pepper. Place chicken in heated skillet and cook until no longer pink and juices run clear (6 minutes per side minimum).
Pour lime sauce over chicken, reduce heat to low and cook approximately 2 minutes. Remove chicken to cutting board to rest. Continue cooking sauce over low heat, whisking occasionally, until thick and bubbly. Slice chicken, place on plates and pour sauce over top.
Serve immediately, serves 4.
Wednesday, October 13, 2010
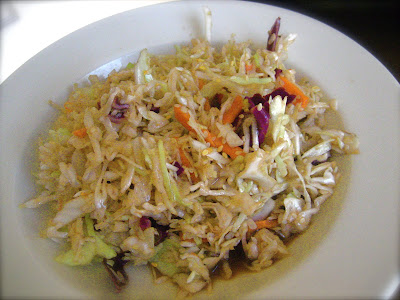
Asian Style Coleslaw
16 oz package shredded coleslaw mix
1/4 c soy sauce
1/4 c lime juice
1/4 c canola oil
3 T brown sugar
2 T rice vinegar
2 T fresh ginger, finely grated
1 T sesame oil
12-15 grinds fresh black pepper, to taste
sesame seeds for garnish, optional
Wash coleslaw mix and spin dry. Place in large ceramic or glass bowl*. In jar with tight-fitting lid add remaining ingredients less sesame seeds. Shake well until sugar is melted. Pour dressing over coleslaw and toss to combine. Sprinkle with sesame seeds just prior to serving. Serves 4.
*Chef's Note: Since this recipe contains a large amount of lime juice, do not use an aluminum bowl to mix the salad or dressing as it will react with the acid in the juice and give the salad an off flavor.
Wednesday, September 15, 2010
Lemon Chicken with Broccoli and Rice
1 (14 oz) can cream of broccoli soup
1 c water
3/4 c uncooked white rice
1 head fresh broccoli, chopped (approximately 2 cups)
2 lemons
8 turns fresh ground black pepper
4 skinless, boneless chicken breasts
Preheat oven to 375°. Butter 3 quart covered casserole dish and set aside. Slice one lemon into rings and set aside.
In medium bowl, combine soup, water, rice, and 2 T lemon juice. Pour into prepared casserole dish. Place chicken on top of mixture and top with lemon rings. Cover dish and bake in center of oven 45-55 minutes or until rice is done and chicken is cooked through. Serves 6-8.
Chef's Note: To make ahead, prepare as above but place in refrigerator until ready to bake. Preheat oven to 350° and bake 1 &1/2 to 2 hours or until chicken is cooked through and rice is done.
Monday, September 13, 2010
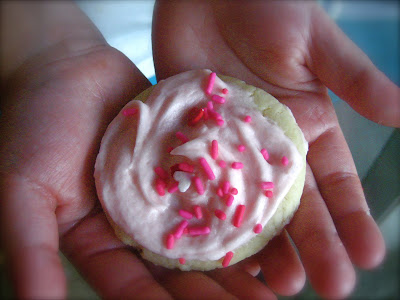
Super Soft Sugar Cookies
Sugar Cookie
1 box white cake mix
2/3 c flour
2 eggs
1/3 c oil
2 T sour cream
1 t vanilla
Preheat oven to 350°.
Mix dry cake mix and flour then add eggs, oil, sour cream and vanilla and mix well. Using small cookie scoop form into 1" balls and place on parchment lined baking sheet.
Flatten balls with heel of hand to about 1/2″ thick. Bake 10-12 minutes, until set. Do not overbake, there should be no browning on edges. Remove to wire rack immediately after baking and cool completely before frosting. Store frosted cookies in airtight container. Yield 30 cookies.
Fluffy Frosting
1/2 c shortening
1/2 c butter, softened
1/4 c milk
1 t vanilla
1 T meringue powder
3 T Dream Whip powder
1 pound powdered sugar (approximately 4 cups), sifted
Beat shortening and butter until smooth and blended. Add milk and vanilla. Beat for one minute then add meringue powder, Dream Whip powder and sugar, (add food color if desired) and mix well on low until blended. Beat on medium high until light and fluffy. Generously frost cookies and add sprinkles. Yield 3 cups frosting (which is way more than is needed for the cookie recipe so be prepared to have extra).
Thursday, September 9, 2010
Celentano Three Cheese Tortellini
I've been told that making your own pasta by had is worth the effort. Maybe, but until I have a free day to "try" my skills I will continue to purchase Celentano frozen cheese tortellini. The package is small, only 13 ounces, so I have to cook two in order to have enough for everyone. And we love it.
I have served it with marinara, or olive oil with parmesan both hot and cold, but my favorite pairing by far is with homemade Alfredo sauce. The pasta is amazing on par with anything you would find in a restaurant. In fact, it is possible this pasta is served at restaurants which don't prepare their pasta from scratch.
Now for the sauce, please please PLEASE don't ever buy an Alfredo sauce in a jar. Please make your own sauce and experience a taste far superior to anything available for purchase at your supermarket. The Alfredo recipe I've posted here is without the spinach and can be adjusted to spicy or mild depending on your preference (but I wouldn't leave the pepper flakes out altogether). It will keep for a couple of weeks in the refrigerator and individual portions reheat wonderfully. Enjoy!
Wednesday, September 8, 2010
Haricort Vert
8 oz fresh Haricort Vert (French green beans), washed
2 T butter
4 cloves garlic, chopped
high quality sea salt, recommended: Fleur de Sel
fresh ground black pepper
1 T lemon juice
Melt butter in small skillet over medium low heat. Add garlic and saute about 30 seconds. Add beans, toss to coat with butter. Cover skillet and reduce heat to low. Cook until beans wilt slightly but are still crunchy and bright green, approximately 5 minutes.
Uncover and remove from heat. Season with salt and pepper, drizzle with lemon juice just prior to serving. May be served hot or at room temperature. Serves 4.
Chef's Note: Haricort Vert green beans have a very mild flavor and are sweeter and more tender than American green beans. The extra cost is worth it. 8 ounces of fresh beans was only just enough for hubby and me today so adjust serving size according to green bean lovers at your table.
Labels:
Garlic,
Green Bean,
Side Dish,
Vegetable
Tuesday, September 7, 2010
Beer Braised Pot Roast ~ adapted from The Pioneer Woman Cooks
1~ 2 1/2 to 3 pound chuck roast
kosher salt and fresh ground black pepper, to taste
3 T olive oil
2 white onions, peeled and cut to thick slices
5 cloves garlic, chopped
1~ 12 oz can beer
1~ 14 oz can beef broth
1 t dried thyme
1 t dried rosemary
Preheat oven to 275°. Heat oil in a large dutch oven over high heat. Season meat generously with salt and pepper. Sear meat on all sides, about 2 minutes per side. Remove meat from pan and lower heat to medium.
Add onions and garlic and saute for 30 seconds. Pour in beer and broth. Add thyme, rosemary, and salt to taste, about 1 teaspoon. Return meat to pot, push to submerge, and place lid on pot.
Cook in oven 2 1/2 to 3 hours, or until meat is fork tender and falling apart. Shred meat in pot with two forks. Dish meat onto plates and spoon juice and onions over top. Serves 6.
Wednesday, September 1, 2010
Steak and Bleu Cheese Salad with Balsamic Vinaigrette
1 pound top sirloin steaks
1 T canola or vegetable oil
salt and fresh ground black pepper
5 oz mixed spring field greens
1/2 one large purple onion, sliced in rings
1/4 c bleu cheese crumbles
1/2 recipe Balsamic Vinaigrette
In grill pan, heat oil over medium high heat 3 minutes. Season one side of steak with salt and pepper and place on heated pan, seasoned side down. Grill steak to desired doneness (recommended medium rare). Remove from heat and let rest at room temperature 10 to 20 minutes minimum. Slice thinly and set aside.
In large bowl, toss field greens, onion and 1/4 c blue cheese with vinaigrette until well mixed. Plate salad and top with steak slices, sprinkle with remaining blue cheese. Serves 2.
Balsamic Vinaigrette
1/4 c balsamic vinegar
2 t brown sugar, optional*
1 T garlic, minced
1/2 t salt
1/2 t freshly ground black pepper
3/4 c olive oil
Place all ingredients in jar with lid. Seal and shake until well blended. Store tightly covered in refrigerator up to 2 weeks.
*High quality aged balsamic vinegar will not require the addition of sugar. If using new balsamic, start with minimal sugar and adjust to taste.
Labels:
Bleu Cheese,
Main Dish,
Salad,
Steak
Tuesday, August 31, 2010
Nacho Tostada
For Shells
6 white corn tortillas
1 c canola oil
For Meat
1 pound ground turkey
1/2 c water
2 T mild taco seasoning, recommended: McCormick
1/2 t ground cumin
1/2 t dried oregano
1/2 t garlic powder
1/4 t cayenne pepper
For Toppings
1 c pinto beans, prepared
1 14 oz can diced tomato, drained
1/2 c Brianna's Chipotle Cheddar dressing
1/2 c shredded cheddar cheese
salt, to taste
sour cream, for garnish
In large skillet over medium heat, brown ground turkey well. Add water, taco seasoning, cumin, oregano, garlic and cayenne pepper. Stir well, reduce heat to low and simmer 10 minutes.
While meat is simmering, in medium skillet over medium-high heat, heat oil to 300°. Gently lower tortillas one at a time into hot oil and cook until golden, approximately 3 minutes per side. Remove to paper towel to drain. Immediately sprinkle with salt then transfer to baking sheet. Continue cooking remaining tortillas.
Preheat broiler to high. Top tortillas with meat, beans, tomato, dressing and cheese equally divided between six tortillas. Place under broiler until cheese is melted. Plate, garnish with sour cream and serve immediately. Serves 4-6.
Chef's Note: Packaged taco seasoning is usually high in salt, so I've used approximately half a packet in this recipe with additional spices for fuller flavoring. By reducing the salt in the meat, I was able to add salt to the tortillas. Believe me, you will want to do this.
Monday, August 30, 2010
Pasta Pile-up with Chicken ~ adapted from Better Homes and Gardens
4 lasagna noodles, prepared to package instructions and cut in half
4 boneless, skinless chicken breasts, sliced
1 t salt
10 grinds fresh black pepper
4 T olive oil, divided plus more for garnish
2 t dried oregano
2 t dried basil
1/4 t anise seed
3 cloves garlic, minced
1 28 oz can diced tomatoes, drained
10 oz fresh spinach
1 T fresh lemon juice
shaved parmesan cheese, for garnish
Wash and dry chicken breasts. Slice into 1/2 inch pieces and add salt and pepper. Sprinkle one side of sliced chicken with half the oregano, basil and anise. Heat 2 T olive oil over medium heat. Add chicken, spice side down, to pan and sprinkle with remaining oregano, basil and anise. Cook chicken until juices run clear, approximately 8 minutes, turning once half way through.
Remove chicken to paper towel to drain. Pour chicken fat from pan and add remaining olive oil until total in pan is approximately 2 T. Add garlic and saute over medium heat until golden. Add tomatoes and cook 3 minutes. Add spinach, mix well and remove from heat.
To plate, place 1/4 c tomato & spinach mixture on plate. Layer with lasagna noodle, another 1/4 c tomato spinach and chicken breast. Continue layering until all tomato spinach mixture is used. Top with shaved parmesan and drizzle with lemon and olive oil. Serves 4.
Friday, August 27, 2010
Chocolate Lava Cakes
4 squares semi-sweet baking chocolate, recommended: Baker's
1/2 c butter (1 stick)
1 c powdered sugar, sifted
2 eggs
2 egg yolks
6 T flour
Preheat oven to 425°. Butter 4 ramekins or individual souffle dishes and place on a baking sheet.
In large bowl, microwave butter and chocolate one minute, or until butter is melted. Whisk until chocolate is completely melted and no lumps remain. Stir in sugar, whisk in eggs and egg yolks. Add flour and mix well. Divide batter between prepared dishes.
Bake 11-14 minutes or until sides are set but center is still soft (but not shiny). Remove from oven and let stand one minute. Carefully run knife around cake edge to loosen. Place dessert plate on top of ramekin and quickly invert cakes onto plates. Dust with additional powdered sugar and whipped cream if desired. Serve immediately. Serves 4.
Chef's Note: These were incredibly easy to make and amazingly good. The batter contains so much chocolate and so little flour that the centers are like hot fudge, not at all like uncooked cake batter. Wow.
Crunchy Baked Potato
3 pounds small red potatoes, washed
1/2 stick butter
2 T parmesan cheese
Salt and fresh ground black pepper
Butter flavored non-stick cooking spray
In microwave safe dish, bake potatoes in microwave 6-8 minutes or until fork tender (no resistance when pierced with fork).
Place potatoes on baking sheet and slice an X into top of each potato. Using potato masher, press potatoes until sides open. Cut butter into 1 T pats and divide between potatoes. Sprinkle liberally with salt and two grinds black pepper on each potato. Spray tops of potatoes with non-stick cooking spray and top with parmesan. Place under broiler until edges begin to brown. Serves 6.
Chef's Note: Don't skimp on the salt. One of the reasons restaurant food is so good is they use plenty of salt in their dishes. Tasting a dish as you go along is invaluable to the completed product, as you discover your own preference for seasonings, but never underestimate the appeal of salt.
Thursday, August 26, 2010
Clearman's Garlic Cheese Toast
4 slices extra-sourdough bread, recommended: Francisco
4 T butter, melted
1/4 c grated parmesan cheese
1/4 t garlic powder
Preheat broiler.
Combine melted butter, cheese, and garlic powder in small bowl. Mix well. Arrange sourdough slices closely on baking sheet and, using a pastry brush, evenly distribute butter mixture on top side of bread.
Place under heated broiler and toast 5 minutes or until golden brown and cheese is crunchy, rotating slices as needed for even browning. Serve immediately. Makes 4 slices (but only serves 2).
Tuesday, August 24, 2010
Petit Pain au Chocolat
2 sheets frozen puff pastry, thawed, each sheet cut into 12 squares
1 egg
1 T water
3 ~ 3.5 oz bars good quality semisweet chocolate, recommended Lindt Excellence 50% Cocoa, separated into squares
Decorator sugar (optional)
Preheat oven to 400°. Line baking sheet with parchment paper or heavily coat with cooking spray.
Place 1 chocolate piece in center of each pastry square. Roll each dough square tightly, completely enclosing chocolate and pinch to seal. Place pastry rolls on baking sheet, seam side down.
Beat egg and water together, brush tops of pastry rolls with egg glaze and sprinkle lightly with decorator sugar if desired. Bake until pastries are golden brown, 15-20 minutes. Remove immediately from baking sheet to wire rack to cool.
Serve warm or at room temperature. Store leftovers (yeah, right) loosely covered.
Yield 24 2-bite pastries.
Chef's Note: The added decorator sugar looks pretty and adds extra crunch but is definitely not traditionally French. For an authentic patisserie, I recommend omitting it all together.
Monday, August 23, 2010
Spinach Alfredo
1/2 c butter (1 stick)
4 cloves garlic, minced
1 T red pepper flakes
8 oz cream cheese
1 c milk, divided
6 oz grated parmesan cheese
10 oz fresh baby spinach
chopped basil
In large non-stick skillet, melt butter over medium heat. Add garlic and cook, stirring constantly, until golden brown.
Add pepper flakes and cream cheese. Whisk until combined. Don't worry if your cream cheese won't incorporate, just keep whisking until it's melted.
Add milk and whisk until smooth. Add parmesan cheese and stir until melted. Add spinach, cover pan and remove from heat. Let stand 3 minutes, remove cover and stir until spinach is wilted.
Serve over asiago ravioli or fettucini, garnish with additional shaved parmesan and basil. Serves 6.
Chef's Note: You could use pre-grated parmesan cheese for this dish, but I wouldn't recommend it. The anti-caking ingredients contained in canisters of cheese affect the melting capability and ultimately affect the taste of the dish. Use a fine box grater or micro-plane (my favorite) and grate your own cheese. It's worth the extra effort.
Labels:
Cream Cheese,
One Pot Dinner,
Parmesan,
Pasta,
Spinach
Friday, August 20, 2010
Red Curry Lentils
2 T olive oil
3 cloves garlic, minced
2 t red curry powder
1 c dry lentils, rinsed and picked
2 carrots, grated
14 oz can petite diced tomatoes
4 c chicken stock
Heat oil in dutch oven over medium high heat 3 minutes. Add garlic and saute, stirring constantly, until caramelized and brown. Add curry powder and continue cooking 2 minutes, stirring constantly. Add remaining ingredients and bring to boil. Cover and reduce heat to low. Simmer one hour, stirring occasionally, until lentils are tender.
Serve over steamed rice. Garnish with shaved coconut, raisins and crushed pineapple if desired. Serves 8.
Thursday, August 19, 2010
Cinnamon Sugar Crisps
4 corn tortillas, taco size
2 c vegetable oil for frying
2 T sugar
1 t cinnamon
1 pint vanilla ice cream
1/2 c caramel topping
Heat oil over medium high heat to 350°. Cut tortillas into 8 wedges and fry in hot oil until brown and very crisp. Remove to paper towels to drain. Immediately sprinkle hot crisps with cinnamon and sugar. Allow to cool slightly.
While crisps are cooling, divide ice cream evenly between 4 bowls. Drizzle with caramel topping and garnish with crisps. Serve immediately. Serves 4.
Wednesday, August 18, 2010
Grilled Ham and Cheese Sandwich with Honey Mustard Dipping Sauce
Sandwich:
4 slices sourdough bread
4 slices Swiss cheese
2 slices ham, recommended: Kirkland Signature spiral sliced ham
3 T butter, melted
1 T grated parmesan cheese
1/4 t garlic powder
Dipping Sauce:
2 T dijon mustard
2 T spicy brown mustard
1 T honey
1/2 t rice vinegar
5 grinds fresh black pepper
pinch salt
Heat griddle to medium heat. Mix melted butter, parmesan, and garlic powder together and brush on one side of each slice of bread. Place two slices of bread on heated griddle, butter side down. Add cheese and ham, top with remaining slices of bread, butter sided up. Cook until well browned and flip to uncooked side, reduce heat to medium low.
Continue cooking until second side is well browned. Remove from griddle and let cool slightly. (Removing the sandwich from the hot pan is very important because the bread should be cooked to perfection, but the cheese needs to continue to melt into happy gooey goodness.)
While sandwich is cooling, place ingredients for dipping sauce in small bowl and whisk to combine. Pour into individual serving cups.
Slice sandwich on the diagonal to make triangles (easier for dipping) and enjoy! Serves 2.
Wednesday, August 11, 2010
Ranch Fries
1 lb frozen french fries
2 T ranch dressing mix, recommended: Hidden Valley Ranch
Preheat oven to 400°. Place frozen fries in single layer on foil lined baking sheet. Bake 20 to 25 minutes or until desired brownness. Immediately transfer hot fries to large bowl and sprinkle with dry ranch mix. Toss well to coat. Serve immediately, serves 6.
Chef's Note: Be sure to add the dressing mix while fries are still hot, the heat helps the seasoning stick to the fries.
Broccoli & Ham One-Pot Meal
2 boxes macaroni & cheese, recommended: Kraft Three Cheese Mini-Shells & Cheese
1/2 c half & half
1 stick butter
2 cups frozen broccoli flowrettes, prepared
1 cup diced ham
1/2 c shredded cheddar cheese
Boil macaroni to package instructions. Drain well and return to low heat. Add half & half, butter and cheese packets. Stir until well combined and butter is melted. Add broccoli and ham, mix well. Divide between 4 bowls, sprinkle with shredded cheese. Serves 4.
Labels:
Broccoli,
Cheddar,
Ham,
Main Dish,
One Pot Dinner
Friday, August 6, 2010
Sweet and Sour Meatballs
Just so you know, I don't always make meals from scratch. I realize this may forever change your perception of my culinary skills, but there are products that are mass produced that are just as good, if not better, than I can make them. For example, I'm not ready to try making my own sweet & sour sauce so I'm going to buy one at the market that's tasty and my family will like.
And don't feel bad for buying frozen meatballs, they're cheaper than buying the ingredients and making them yourself. Plus they cook in 5 minutes, so lunch is ready in record time. And mommy's happy when everyone's tummy is full.
20-30 frozen meatballs
1 jar sweet & sour sauce, recommended: La Choy
4 c white rice, prepared
2 c frozen broccoli flowrettes, prepared
red pepper flakes, optional
Place frozen meatballs in microwave safe dish with lid. Pour jar of sweet & sour sauce over meatballs. Cover dish with lid and microwave on high 6-8 minutes, stirring halfway through cooking.
While meatballs are cooking, place frozen broccoli in steamer basket and cook over boiling water until bright green, approximately 4 minutes.
In shallow bowl, dish rice and cover with meatballs and top with broccoli. Drizzle with sauce and red pepper if desired. Serve immediately. Serves 4.
Tuesday, August 3, 2010
Vintage Juicer
Ah, the hunt for the obscure kitchen utensil. While rummaging through old, dusty shelves of a thrift store is not for everyone, it happens to be one of the things I find particularly enjoyable. You never know when you might find just the thing you've been looking for... like this beautiful vintage glass juicer.
Based on the design and color, I would place the date the juicer was made circa 1950 making it 60+ years old. Isn't it wonderful! I saw it from across the shelf in a tiny thrift store in Ventura, CA when I was there last month on vacation. I practically started panting in anticipation before I even picked it up, afraid touching it would make me want it and that the price would put it out of my budget.
Imagine my surprise when the little paper tag said "$8 ~ broken, as is". I started looking for where it was broken, surely the bowl was cracked rendering it useless. And then I found the chip in the base (can you see it in the picture?). The break was so long ago that it has worn smooth from decades of use.
"Well, my little mon amie, I'll just take you home avec moi!" And, 12 juiced lemons later, it will forever have a place in my kitchen.
I am a happy bon viveur.
Labels:
Kitchen Tips
Wednesday, July 28, 2010
Grilled Pineapple Skewers
1 fresh pineapple, peeled, quartered and cut into 1/2 inch chunks
2 T dark rum (or 1/4 t rum extract)
1 c real maple syrup
1/4 c fresh blueberries
1 pint vanilla ice cream
8 skewers
8 fresh pineapple leaves, for garnish
In large bowl, mix rum and maple syrup. Toss pineapple chunks in syrup mixture and thread, alternating with blueberries, onto skewers. Brush fruit with syrup and grill 2 to 3 minutes per side or until softened. Remove from grill and cool to room temperature.
Scoop ice cream onto 4 plates or shallow bowls. Stand 2 pineapple leaves in ice cream and plate with 2 pineapple skewers. Drizzle with remaining syrup. Serve immediately. Serves 4.
Chef's Note: To reserve pineapple leaves, cut from fresh pineapple and place in a bowl of water until ready to use.
Tuesday, July 27, 2010
Blueberry Crumb Cake ~ Adapted from The Pioneer Woman Cooks
Cake
1/4 c plus 1 T butter, softened
3/4 c sugar
1 egg
1/2 t vanilla
2 c flour
2& 1/2 t baking powder
1/2 t salt
1/4 c half & half
1/2 c milk
2 to 3 c fresh blueberries
Topping
6 T butter
1/2 c sugar
1/2 t cinnamon
1/2 c flour
1/4 t salt
2 T sugar to add after baking, optional
Preheat oven to 350°.
In medium bowl, combine flour, baking powder, and salt; set aside.
In large bowl, cream butter and sugar. Add egg and vanilla; mix until combined. Add flour mixture and milk (with half&half) alternately in three additions until incorporated. Gently fold in blueberries until evenly distributed.
Spray a 9 x 13 inch baking pan with non-stick cooking spray. Pour in cake batter and spread until even.
In third bowl (or using the empty bowl from the flour mixture), combine topping ingredients and cut together using a pastry cutter. Sprinkle over top of cake.
Bake cake 40 to 45 minutes, or until golden brown. Sprinkle last 2 T sugar over cake immediately after removing from oven, if desired. Store loosely covered at room temperature.
Serve warm as dessert with ice cream or as breakfast with softened butter or unsweetened whipped cream. Serves 12.
Chef's Note: Who am I kidding? I didn't need any ice cream or whipped cream, I just ate it warm right from the pan!
Kitchen Knives
Is it just me, or are there suddenly a million kitchen knives to choose from?
I understand that knives need to be replaced every so often, especially if you drop one in your garbage disposal or in the actual garbage, but I don't recall having the choice of 20+ knives in my supermarket before. Maybe everyone is getting the notion to become the next Iron Chef, but I don't think that's really it. Maybe it's just education as a result of friends like Emeril, Martha, Bobby, Alton, Rachel... I refer to them by their first names, but you know who I mean.
As a result of the plethora of "new" knives on the market, I thought I would educate my readers a bit on what I know about kitchen knives. My knowledge is limited, but these knives are the ones I use day in and day out. They are the work-horses of my kitchen and they make my life easier.
Here you see, from top to bottom, the following knives:
Santoku
Chef's
Bread
Boning
Paring
The top two knives, the Sentoku and Chef's, are general all-purpose knives that do the most work in a kitchen. The curved blade shape allows you to cut and chop using a rocking motion. As the blade rocks, the knife remains stable and the work is done efficiently and quickly.
The serrated blade on my chef's knife has notches that help to cleanly cut through soft foods like eggs, tomatoes, and sandwiches without damaging the food with an edge that looks like a tiny saw.
This type of serration is time consuming to sharpen yourself and expensive to have professionally done. And as you can clearly see, with extensive use the tiny teeth chip off causing the knife to snag and tear when slicing meats. Not a good thing.
For this reason, I do not recommend purchasing expensive serrated knives. Inexpensive ones will do the job as well as more costly knives and you won't feel like you have to keep using a dull knife because it will cause you a fortune to have it professionally sharpened.
Fairly new to the American kitchen is the santoku knife. It's slim design is Japanese (go figure) and is currently my favorite kitchen knife. It is similar to a traditional chef's knife in that is is used for similar tasks. "San" is the Japanese word for three and "toku" is the Japanese word for good things so the knife possesses three good works in that it can slice, dice and chop.
The santoku blade is typically thinner than a chef's knife which allows for a smoother and more precise cut. The little oval-shaped indentations on the sides reduce friction, allowing sliced food to fall to the side instead of sticking to the blade. And that's a good thing.
These are the bottom two knives in the picture, the top one is a boning knife and the bottom one is a paring knife.
While the paring knife is said to be the miniature equivalent of the chef's knife, I find myself turning to the boning knife more often for slicing delicate foods such as soft cheese and tomatoes. Its flexible, long, thin blade works as well as the larger chef's knife and the smaller size is more comfortable to use on smaller foods.
The paring knife works well for peeling fruits and vegetables that are too delicate for a vegetable peeler, so that is its primary use for me.
The knife in the middle is the bread knife. Pretty much only used for slicing bread, the serrated blade is a MUST for slicing through thick outer crusts of fresh baked loaves without crushing the soft inner bread. If a bread knife's sole use is slicing bread, the serrated blade will virtually never dull.
Knives are best stored in a knife block. This makes them easy to find, keeps them from dulling each other while banging around in a drawer, and keeps you from accidentally cutting yourself while reaching in a drawer to find the knife you need.
Empty knife blocks are easy to find at thrift stores and yard sales so pick one up for a buck and add your own knives. It's a great way to achieve an eclectic looking kitchen.
Labels:
Kitchen Tips
Monday, July 26, 2010
Ranch Potato Salad
5 lbs russet potatoes, washed thoroughly
1 T salt
1/2 c ranch dressing, recommended Litehouse Homestyle Ranch
1/2 c sour cream
2 T fresh dill, finely chopped
3 t rice vinegar
10-12 grinds fresh black pepper
In large pot, cover potatoes with water. Add salt and bring to boil over medium heat. Boil potatoes until it slides from knife when pierced (approximately 15 minutes). Drain and allow to cool to room temperature.
When cool to the touch, coarsely cut potatoes into bite size pieces and place in large mixing bowl. Add ranch dressing, sour cream, vinegar, dill and pepper. Gently fold until well combined. Add salt and more pepper to taste. Refrigerate, loosely covered, a minimum of 4 hours before serving. Serves 8.
Chef's Note: This is a dish prepared by taste alone. I did not follow any recipe so all measurements are approximate. Adjust as your taste prefers. I prefer to leave the potatoes un-peeled as it adds to the home-made look and texture. If you want to peel the potatoes, do so prior to boiling and lessen the cooking time by 2 minutes.
Corn and Black Bean Salsa
1-15 oz can black beans, rinsed and drained
1 cup frozen or fresh corn, cooked
3 roma tomatoes, seeded and diced
2 T taco seasoning, recommended McCormick
1/4 t garlic powder
salt (to taste)
10-12 grinds fresh black pepper
1 lime, juiced (approximately 2 T juice)
1/4 c sour cream
fresh cilantro, finely minced for garnish (if desired)
In large bowl, place beans, corn, and tomato. Sprinkle with seasonings (with exception of salt) and toss to combine. Add lime juice and sour cream and gently fold until well mixed. Season with salt to taste. Add cilantro and serve. Serves 8.
Chef's Note: Although this is an excellent salsa to dip with chips, we ate it with a spoon like a side dish with quesadillas. And it was delicious.
Saturday, July 3, 2010
Salted Mini Chocolate Truffles
3.5 oz good quality semisweet chocolate, recommended Lindt Excellence 50% Cocoa
3.5 oz good quality dark chocolate, recommended Lindt Excellence 90% Cocoa
1/2 can sweetened condensed milk (approximately 3/4 c)
1 t vanilla
1 T strong brewed coffee or espresso
3 oz milk chocolate Almond Bark
Coarse ground Kosher salt
Heat dark chocolates and condensed milk in a double boiler over medium low heat until chocolate is melted, stirring constantly until completely smooth. Stir in vanilla and coffee. Remove from heat, cover and refrigerate overnight.
Bring chocolate to room temperature (approximately 2 hours). Using small mellon-baller, scoop chocolate and roll into balls. Place on wax paper and set aside.
In microwaveable bowl, melt almond bark according to package instructions and stir until smooth. Drop one truffle ball into melted chocolate and, using a fork, roll truffle until completely coated with milk chocolate. Remove truffle with fork, shake off excess chocolate and return to wax paper. Sprinkle top with Kosher salt and place in refrigerator until set, approximately 30 minutes. Store in airtight container.
Yield: 30-40 mini truffles.
Chef's Note: These are one bite truffles. Kate wanted me to make them with the bigger end of the mellon-baller, but I don't like having melting chocolate on my fingers while I savor the first bite... I prefer not to be rushed through my chocolate indulgence just because I need to consume the second gooey bite. I'd much rather pop a whole truffle in my mouth and blissfully enjoy. And besides, these contain so much dark chocolate I can't imagine wanting to eat more than one bite.
Chocolatiers take heed; In my extensive chocolate eating repertoire, the one bite truffle is the perfect chocolate tasting experience.
Tuesday, June 29, 2010
Lemon Thyme Cookies with Lemon Glaze
for cookie;
1 c butter, softened
1 1/2 c sugar
1/2 c brown sugar
2 large eggs, lightly beaten
1/3 c sour cream
2 T lemon juice
1 T lemon zest
1 t vanilla
4 c flour
1 T baking powder
1 t baking soda
1/2 t salt
4 t lemon thyme (or regular thyme), finely chopped
Cream butter and sugar. Add eggs, sour cream, 2 T lemon juice, 1 T zest, and vanilla; beat well. In a separate bowl stir together flour, baking powder, baking soda, salt, and thyme. Add dry ingredients to creamed mixture and beat until mixed.
Drop by teaspoonfuls on ungreased cookie sheet, flatten slightly with palm of hand. Bake 8-10 minutes until just brown around edges. Cool on sheet 2 minutes then remove to rack to cool completely.
for glaze;
1/4 c lemon juice
2 T lemon zest
1 1/2 c powdered sugar, sifted
Combine powdered sugar, lemon juice and lemon zest in a small bowl and stir until smooth. Dip top of cookies into glaze and return to rack to set. Allow glaze harden at least 2 hours. Store in an airtight container. Yield approximately 60 cookies.
Insalata Caprese
2 ripe tomatoes, cut to 1/4" slices
8 oz fresh mozzarella, cut to 1/4" slices
15-20 fresh basil leaves, plus more for garnish
2 T olive oil
Kosher salt and fresh ground black pepper
On two large plates, layer alternating slices of tomatoes and mozzarella, place a basil leaf under each tomato. Drizzle with olive oil and season with salt and pepper to taste. Serve immediately, serves 2.
Labels:
Basil,
Mozzarella,
Salad,
Tomato
Subscribe to:
Posts (Atom)